macOS Utility Using XPC and swiftUI
Motivation

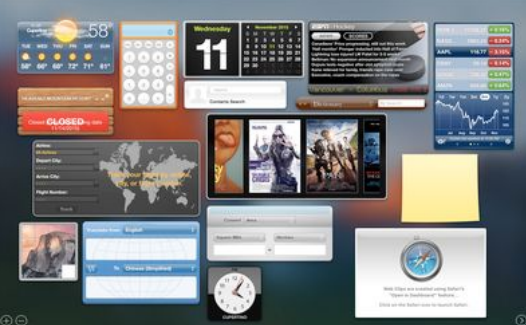
● Apple disabled the Dashboard feature by default in the Yosemite release of 2014

● Apple removed the Dashboard feature entirely in the Catalina release of 2019

● I used the dashboard widget, iStat Pro, to monitor my Macbook and Mac Mini machines, particularly their temperatures

● I could never really do anything about any overheating problems, but it supported my claims of poor thermal design when I shook my fist in Cupertino’s direction

● iStat Pro had other uses, such as per-process CPU utilization, from which direct action could be taken

RIP
Background
  • I set out to regain the temperature sensor data that supported my claims of poor thermal design on Apple’s part. I came across some projects on GitHub that all shared a file from the excellently named developer, ‘devnull’, for interaction with Intel’s System Management Controller (SMC) for retrieving the temperature sensor readings [1, 2, 3, 4, 5].
  • My initial plan was to create a Today View widget for macOS’ Notification Center for viewing the temperature sensor data, but I ended up extending that to displaying the data from a taskbar item as well.
  • To do so, I needed to interact with devnull’s SMC commands.
SMC Commands

● I am using the versions of smc.h and smc.c from [3]

● Line 95 of [3] (#if MAC_OS_X_VERSION_10_5) is interesting because this is a check to determine whether to use newer 64-bit commands or deprecated 32-bit ones in kernel extensions [6]. This check occurs in the function, kern_return_t SMCCall(...)’, which is used indirectly (through ‘kern_return_t SMCReadKey(...)’) by ‘double SMCGetTemperature(char* key)’.

● Future work will involve reverse engineering Apple’s open source files at [7].

● I have added some more key values to pass to the ‘SMCGetTemperature’ function, and these are ‘TC0E’ and ‘TC0F’, for the CPU temperature sensors [8].

Enter XPC

● I want to limit the interaction with the SMC through devnull’s code as much asfpossible, and to that end I am using XPC to handle and sandbox thefcommunication.

● Apple provides two XPC APIs [8]:

○ NSXPCConnection API - Objective-C-based, provides a remote procedure call mechanism

○ XPC Services API - C-based, provides basic messaging services between a client application andfa service helper

● I am using the XPC Services API, because I would like avoid Objective-C infthis project

Project Setup and Adding XPC Target

● Start a new Xcode project, select macOS platform, select ‘Cocoa App’ within the ‘Application’ section of the new project menu

● Within Xcode, File -> Target…In the pop-up menu, select ‘macOS’ and then XPC Service

Convert XPC Boilerplate to Swift

● Xcode will create the necessary files for an XPC Service with Objective-C boilerplate, but I wanted to avoid Objective-C wherever possible in this project

● Luckily a blogger, Matthew Miner, has a post about converting these files to Swift [9]. Interested parties should consult that source, but the gist is repeated here:

○ Replace all extensions with ‘.swift’

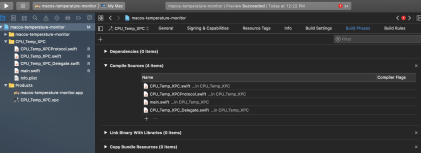
○ Add them to the target’s ‘Compile Sources’ build phase

○ Replace file contents with Swift translations

■ These can be seen in [9, 10]

XPC Contents

● As a test, I used Matthew Miner’s XPC service, which converts a string passed to it to uppercase in service.swift (his was ‘MyService.swift’, mine is ‘CPU_Temp_XPC.swift): import Foundation class CPU_Temp_XPC: NSObject, CPU_Temp_XPC_Protocol { func upperCaseString(_ string: String, withReply reply: @escaping (String) -> Void) {letresponse = string.uppercased() reply(response)}

}

● The service conforms to the protocol, ‘CPU_Temp_XPC_Protocol.swift’ (MyServiceProtocol.swift for

Matthew Miner)

import Foundation

@objc public protocol CPU_Temp_XPC_Protocol {

func upperCaseString(_ string: String, withReply reply: @escaping (String) -> Void)

}

Test XPC Setup

● I added some front-end logic to create a window containing a text field, a label, and a button

● When the user clicks the button, the contents of the text field are converted to uppercase by the XPC service and the result is placed as the text of the label

● Code can be seen at [10], and the result should be:

Add the SMC files

● Next it was time to use the XPC service to communicate with the temperature sensors through the commands in the SMC files

● A group named ‘SMC’ was added to the XPC target and the ‘smc.c’ file from [3] was added to the group

● Xcode prompted with the option to automatically create a header file, and this was accepted

● Xcode prompted with the option to automatically create an Objective-C bridging file, and this was accepted, and this file was never altered from the boilerplate

Wire the SMC Files with the XPC Service

I doubt I am following best practices here, and any advice is welcome.

I added the the function, ‘func getCPUTemp(withReply reply: @escaping (String) -> Void)’ to the XPC protocol and the XPC service with the definition [11]:

func getCPUTemp(withReply reply: @escaping (String) -> Void){

_ = SMCOpen()

var toReturn = ""

let sizeToReturn: CUnsignedLong = 10

var addressBuffer = [Int8](repeating:0, count:Int(sizeToReturn))

getCpuTemp(&addressBuffer, Int(sizeToReturn))

let data = Data(bytes: addressBuffer as [Int8], count: Int(CUnsignedLong(sizeToReturn)));

toReturn = String(data: data, encoding: .utf8) ?? ""

SMCClose()

reply(toReturn)

}

In particular, the value for ‘sizeToReturn’ was made arbitrarily. The functionality for averaging the sensor readings for the keys, ‘TC0E’ and ‘TC0F’, is shown on the next slide

Function added to smc.c

void getCpuTemp(char* to_write, size_t size)

{

double temperature_A = convertToFahrenheit( SMCGetTemperature(SMC_KEY_CPU_0_DIE_TEMP_A) );

double temperature_B = convertToFahrenheit( SMCGetTemperature(SMC_KEY_CPU_0_DIE_TEMP_B) );

double avg_temp = temperature_A;

if (temperature_B != 0.0 && temperature_A != 0.0) {

avg_temp = (temperature_A + temperature_B) / 2.0;

}

snprintf(to_write, size, "%fF", avg_temp);

}

Note, from ‘smc.h’:

#define SMC_KEY_CPU_0_DIE_TEMP_A "TC0E"

#define SMC_KEY_CPU_0_DIE_TEMP_B "TC0F"

Use Background Timer To Retrieve Sensor Data

● A new Swift file, ‘Background_Timer.swift’ was added to the group, ‘macos_temperature_monitor’

● This file [12] contains two classes:

○ ‘Background_Timer’, which conforms to the ‘ObservableObject’ protocol for updating the UI

○ ‘RepeatingTimer’, which uses the timer functionality described at [13]

● ‘Background_Timer’ initializes an instance of ‘RepeatingTimer’ to set the value of a published variable with the result of the sensor reading as returned by the XPC service on a repeating interval

● The next slide shows an updated version (compared to [12]) of the Background_Timer’ class for the curious 

cont.,

class Background_Timer: ObservableObject {

 var cpu_temp_from_bg = ""

 @Published var cpu_Temp_copy = ""


 let myRT: RepeatingTimer


 init() {

 myRT = RepeatingTimer(timeInterval: 2)


 myRT.eventHandler = {

  print("Timer Fired")

  self.setCPUTemp()

 self.updateCPUTemp()


 print("CPU temp: \(self.cpu_Temp_copy)°F")

 }

 myRT.resume()

 }


 func updateCPUTemp() {

 DispatchQueue.main.sync {

 self.cpu_Temp_copy = String(format: "%3.2f", (cpu_temp_from_bg as NSString).doubleValue)

 }

 }


 func setCPUTemp() {

 let connection = NSXPCConnection(serviceName: "com.grizz.CPU-Temp-XPC")

 connection.remoteObjectInterface = NSXPCInterface(with: CPU_Temp_XPC_Protocol.self)

  connection.resume()


 let service = connection.remoteObjectProxyWithErrorHandler { error in

 print("Received error:", error)

  } as? CPU_Temp_XPC_Protocol


  service?.getCPUTemp() { response in

  self.cpu_temp_from_bg = response

 }

 }

}


Note that the ‘@Published’ property wrapper is a feature of

swiftUI that allows an object to announce to the UI when

changes occur.

The demo UI for this project, in ‘ContentView.swift’ then

uses this to update a text field:

struct ContentView: View {

 @ObservedObject var my_BG_T = Background_Timer()

 var body: some View {

 VStack {

 Text("CPU Temp: \(my_BG_T.cpu_Temp_copy)°F").frame(

minWidth: 200,

idealWidth: 600,

maxWidth: .infinity,

minHeight: 200,

idealHeight: 400,

maxHeight: .infinity,

alignment: .center)

 }

 }

}

Note also that the ‘Background_Timer’ class uses an intermediate variable, ‘cpu_temp_from_bg’. This is to avoid a warning when trying to update the UI outside of the main thread. The function ‘updateCUPTemp()’ then synchronously updates the published variable to the main thread.

Review

So far the parts of the project are:

  • An XPC service to sandbox the interactions with SMC, specifically retrieving the CPU temperature sensor values for the keys, ‘TC0E’ and ‘TC0F’
  • A background timer to retrieve the temperature values on a repeating interval
  • A swiftUI front-end to display the averaged reading from those sensors 
Sneak Preview of Next Steps

● The next step was to add a ‘Today View’ Widget to the Notification Center.

● I added a ‘Today Extension’ target to the project. The main feature that distinguishes a Today Extension widget, is that it conforms to the ‘NCWidgetProviding’ protocol [14]

● I also augmented the data sharing through the ‘@Published’ wrapper to use the ‘UserDefaults’ macOS feature [15]

● The widget’s ‘TodayViewController.swift’ and UserDefaults files are shown in the next slides

cont.,

import Cocoa

mport NotificationCenter

import SwiftUI

class TodayViewController: NSViewController, NCWidgetProviding {

@IBOutlet weak var cpuTemp: NSTextField!

var myRT = Timer()

override var nibName: NSNib.Name? {

return NSNib.Name("TodayViewController")

}

override func viewDidLoad() {

super.viewDidLoad()

}

override func viewWillAppear() {

myRT = Timer.scheduledTimer(timeInterval: 3, target: self,

selector: #selector(updateUI), userInfo: nil, repeats: true)

RunLoop.main.add(myRT, forMode: .common)

}

@objc func updateUI() {

 self.cpuTemp.stringValue = ExtensionDataManager.UDCpuTemp

}

func widgetPerformUpdate(completionHandler: (@escaping (NCUpdateResult) -> Void)) {

updateUI()

 completionHandler(.newData)

}

}


Note that this class uses a standard ‘scheduledTimer’ as opposed to a ‘dispatchSourceTimer’ for now. I plan to experiment with the relative overheads of both options. The heavy lifting in this widget is done by the built-in ‘viewWillAppear()’, which instantiates a scheduled time, and adds that timer to the widget’s main RunLoop. The Timer then uses its ‘selector’ to get the value within the UserDefaults for the key, ‘UDCpuTemp’ and use it to set the value for the Widget’s textField.

Using UserDefaults

import Foundation

enum ExtensionDataManager {

private static let userDefaults = UserDefaults(suiteName: "group.com.grizz.macos-temperature-monitor")

static var UDCpuTemp: String {

get { return userDefaults?.value(forKey: .cpuTemp) as? String ?? "-" }

set { userDefaults?.setValue(newValue, forKey: .cpuTemp) }

}

}

private extension String {

static let cpuTemp = "WidgetCpuTemp"

}

UserDefaults allow key-value pairs of data to be shared among components of the application.

As currently written, the TodayView widget requires that the main application is running, because the main application sets

the value for ‘cpuTemp’ within userDefaults using the ‘Background_Timer’:

init() {

myRT = RepeatingTimer(timeInterval: 2)

myRT.eventHandler = {

ExtensionDataManager.UDCpuTemp = "CPU Temp: \(String(format: "%3.2f", (self.cpu_Temp_copy as NSString).doubleValue))°F"

}

myRT.resume()

}

A Taskbar Item

A Taskbar Item

This is added within the main application’s ‘AppDelegate.swift’ file:

var statusBarItem: NSStatusItem!

var myRT = RepeatingTimer(timeInterval: 2)

func applicationDidFinishLaunching(_ aNotification: Notification) {

// Create the SwiftUI view that provides the window contents. Not necessary for the taskbar item.

let contentView = ContentView()

let statusBar = NSStatusBar.system

statusBarItem = statusBar.statusItem(withLength: NSStatusItem.variableLength)

statusBarItem.button?.title = ExtensionDataManager.UDCpuTemp

myRT.eventHandler = {

guard let statusButton = self.statusBarItem.button else { return }

statusButton.title = ExtensionDataManager.UDCpuTemp

}

myRT.resume() A button with text was the simplest approach, but this may change in the future.

Future Work

● devnull’s SMC files contain functionality for setting the fan RPM values

○ I am tempted to try extending this project to allow for custom fan curves based on temperature ranges from the sensors

● I would like to use the taskbar button to allow the user to select which sensor values they would like to see. Similar functionality could also be added to the Today View widget

● I need to update the blog post [16] and GitHub repository [10, 11, 12] with the Today View widget, UserDefaults, and taskbar item enhancements

● I also need to either

○ add a launchd launcher for the main application (even if I remove the demo windowed UI), because the main application updates the UserDefaults temperature value used by the widget

○ try converting the widget to use the SMC files, but I do not think the widget’s sanbox will allow that

● Confirm that the 64-bit commands from [6] are used instead of the 32-bit ones